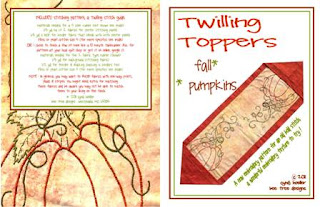
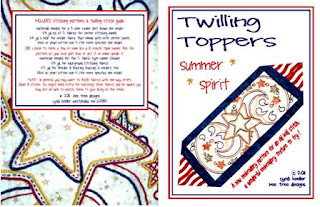
Have you seen or heard about twilling? I hadn't until about two years ago and I only learned it about a year ago from Pauline Quigley. It is easy, pretty fun, and a little addicting if you are a stitcher. It makes a cool textured stitch!! And you can adapt it to many things.
These are my twilling patterns that I have at the quilt shops.
See list of shops on right. I'm also working on a few new runners and a BOM quilt with twilling.
These are my twilling patterns that I have at the quilt shops.
See list of shops on right. I'm also working on a few new runners and a BOM quilt with twilling.
If you want any of my patterns contact the stores from list on the right. I know the ladies at Sew Sweet Quilt Shop ship things because I order fabric and patterns from them , not positive about the others. Specialty Quilts does not ship. They're not all internet stores. And I'm sorry I don't have them in PDF form yet. If you want them and have trouble acquiring them, ask your local quilt store to get them from me or send me an email and we'll work something out.
Below are left handed and right handed directions on how to do twilling also called palestrina stitch. You can print from the picture or you can click on link below each picture for a link to google docs for a PDF version of either hand or BOTH hands
right handers click below
I like to use floss and pearl cotton #5, each for different looks. If I want it bold I use one strand of pearl cotton or all 6 strands of floss (floss is little harder to work with because you have 6 strands but you also have waaaaay more colors to choose from). If I want to mix it in my redwork or embroidery I usually use 3 strands. I have used 2 strands of pearl cotton for a BIG chunky look and it's pretty cool, but uses a lot of thread quickly!!
I recently was asked what I use to transfer designs. There are many other ways to transfer designs, but this is my personal preference. I trace the designs using any of the blue water soluble pens/markers directly on to fabric. The various brands are all about the same. Kelly Jackson at I have a Notion has them and ships internationally. Jessica & Jeannette have them at Sew Sweet Quilt but not on their web store but in their brick & mortar store so call them at 1-660-548-3056 they ship too, not positive about international. Some pens have finer points than others. For twilling, a fine point is not a big deal. For redwork, sometimes is nice to have a fine point. If you do not have a light table, tape design in place on glass table top or window with a light or sun shining through the glass. Center fabric on design, and tape or weight down to prevent shifting (the low tack painters tape is pretty good). Trace the designs with the blue pens. Work your stitching then RINSE WELL in cool water, blot excess water out, Do not wring out, it just puts in excess wrinkles, and let air dry, applying no heat. I smooth them out on a clean bath towel or smooth and pin to the design wall to let dry.
The DOWNSIDES of using the blue pens...... HEAT or extended lengths of time will sometimes, not all times, cause them to "set" the design in the fabric permanently. It usually does not leave the blue color just a gray shadow when rinsed. It reacts in some fabrics more than others....... I have heard that some pink fabrics have this issue? So far, I have not had this happen except for a the remaining part of a set of blocks that were well over a year old, maybe two, that road around in the car most of the time and were not embroidered yet. I have even ironed fabrics that had been traced and not stitched yet...........Ironing IS NOT recommended....I did it before I found out about the heat issue/reaction with these pens.
SO, do not leave your embroidery bag in the hot car in the summer or next to the heater in your car in winter. If you don't know how long it will take you to embroider your project, cut all your blocks so fabric is same but only trace a block or two at a time, stitch, rinse, and air dry as you go.
Here are individual pictures of the covers.
Have a great day, let me know if you have any questions.
Cyndi Hoeller, owner Bee Tree Designs.


Cyndi, so happy to see that you have made your patterns available in several stores now. Keep on growing...
ReplyDeleteWow! Cyndi, you have been busy. That is so awesome. I like the designs that you have created so far. I have not tried the technique yet.
ReplyDeleteCongratulations!
Thank you so much for this post. I want to let you know that I posted a link to your blog in CBH Digital Scrapbooking Freebies (please, notice the new url for my blog), under the Page 4 post on Aug. 25, 2012. Thanks again.
ReplyDeleteI had a friend in nursing school and later (my apartment mate)who did twilling. I also have a piece of twilled art that an international quilting pal from England made me along with a paper maiche (sp!) journal she made for me. Treasure it. The small piece is on my bulletin board and the journal tucked away at present.
ReplyDeleteThose are absolutely beautiful! I love everyone of them. We just need your patterns here in CO. I am so glad your here and rocking those patterns out once again. Your in my thoughts often.
ReplyDeleteHugs,
Vicki
I just heard the word telling yesterday!!! I just started working in the fabric dept at a craft store and was curious when a customer ordered a yard of fabric that matched yarn she had. Being addicted to crocheting, I asked what she was doing with the yard. She said she was twiling the fabric for a baby blanket. I had no idea what that meant ( I'm loving how much I learn from the customers). This time however, I didn't ask what it was. There was a line behind her and I easily could've gotten caught up in the excitement of a new idea!!
ReplyDeleteMy question; have you ever used yarn to twill?
ReplyDeleteThis comment has been removed by the author.
ReplyDelete